
Pixel Art Step by Step, Example Two
This example shows the creation process for the lighthouse keeper.
The lighthouse keeper was first drawn apart from the lighthouse. When the lighthouse keeper was good enough, it was included in the illustration of the lighthouse.
This part included some masking, which will also be explained in this chapter.
Sketch
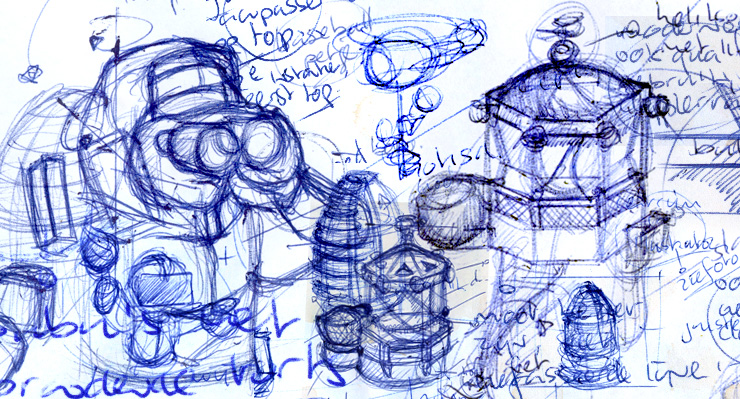

The outline of the sketch is traced, so that I can have a reference (see image 1).
The pixels of the outline are isolated and re-colored to black (see image 2).
Areas of color are quickly filled to get an overall idea of the shading.
Next I focus on the head and goggles (see image 3). The contrast of the hat is
reduced, the hat gets some extra details and the head becomes smaller
(see image 4).
The arm on the right gets some attention and is changed for a better
articulation (see image 5). The goggle is drawn in more detail, and shadow is
added in the face (see image 6).

The arm on the left is adjusted, the hand on the left is removed; the
position didn't look very convincing (see image 7). The contrast around the goggle
area is increased (see image 8). The shading of the hat is changed; less contrast,
the angle of the arm on the right is changed, and the contrast of the
lines on the jacket is changed (see image 9).
Shadow is added to the sleeve of the arm on the right. The outline of
the goggle is partly removed on the right top side (see image 10). The arm on the
left is drawn with more detail, and the hand on the right gets some
extra attention as well. The outline of the walkie-talkie is also drawn (see image 11).
The hand on the left is drawn again, the angle of the walkie-talkie
changes slightly in relation to the previous state (see image 12).

The arm on the left is moved one pixel towards the body, and the arm on the right is drawn more precisely (see image 13). The jacket gets a deeper shadow, and the antenna of the walkie-talkie is anti-aliased (see image 14). The illustration of the lighthouse keeper is finished for the moment. The illustration needs to be combined with the lighthouse illustration that was drawn earlier.
Combining Two Illustrations
By drawing lighthouse and the lighthouse keeper seperatly I have created some freedom in
positioning.
Drawing the lighthouse keeper takes more time, but the benefit of
positioning is worth the effort.
MS Paint does not support layers, so I choose Adobe Photoshop to combine
both illustrations.
By using layers, both illustrations can be moved around separately to
find the best option.
The lighthouse illustration has to be prepared, because the foreground
and background are drawn in the same illustration.
The top layers should contain the front of the lighthouse. The next
layer underneath the top layer should contain the lighthouse keeper and
the last layer should contain the background behind the lighthouse.
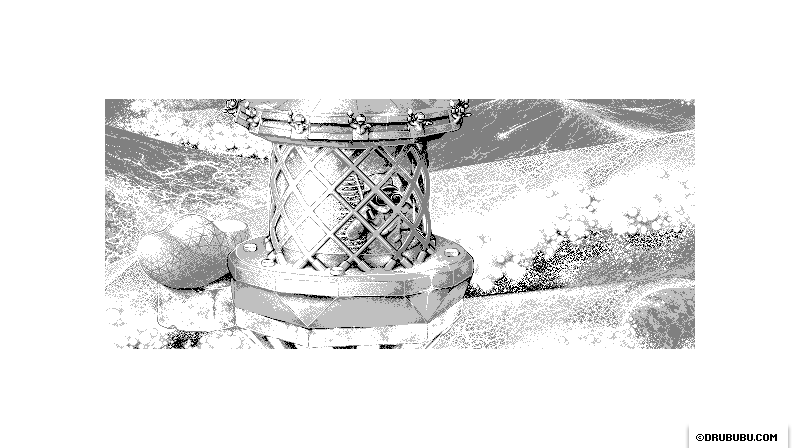
The lighthouse keeper and the lighthouse itself are combined in Adobe
Photoshop and copied as one layer in MS Paint (see image 15).
To blend both illustrations together, shadow is added to the lighthouse
keeper as well as inside the interior of the lighthouse (see image 16). Highlight
is added to the arm on the left, and the two red lines are added to
indicate the highlighted area on the glass. Again shadow is added to the
lighthouse keeper (see image 17).
Shadow is added to the interior on the left lower side and the top right
side. The waves at the background behind the lighthouse, which can be seen through
the glass, are drawn outside the red lines. The area between the red
lines will remain white as result of the reflection of sunlight (see image 18).
Shadow is added to the left side of the interior, and contrast is added
to the right side of the interior. The red lines are drawn gray because
the red has made it difficult to judge if the overall look is right
(see image 19). The right side of the lighthouse is adjusted to get a more
fluent/more realistic transition to the highlighted area on the glass.
Two thin, barely visible, highlighted areas are added on both sides of
the glass (see image 20).
The interior gets light in the middle, and the boundaries of the
highlighted areas of the glass on the right side are softened (see image 21). The
interior around the light is fine-tuned. The head and hand of the
lighthouse keeper gets shadow (see image 22).
The light gets more contrast (see image 23). The light is fine-tuned; the previous
horizontal lines are bent slightly, and a vertical line is added to the
light construction. The hat of the lighthouse keeper gets some shadow
and the lower part of the lighthouse keeper is changed a little bit
(see image 24).
The newly added vertical line is faded out as a result of the more
fluent transition on the right side of the highlight on the glass. After
adding and removing some pixels, this part of the pixel art illustration
is finished (see image 25).