Scaling Pixel Art
Be sure to start with the right size of your pixel art illustration; try
to prevent scaling pixel art, or it will ruin your carefully made
illustration.
If you really need to scale your pixel art illustration, you have a
number of options. Your pixel art illustration can be scaled by hand, in
Adobe Photoshop, or in MS Paint.
In this chapter, the pixel art illustration with the road worker is reduced by 50%.
Scale by Hand
Scaling your pixel art illustration by hand is the most time-consuming option.
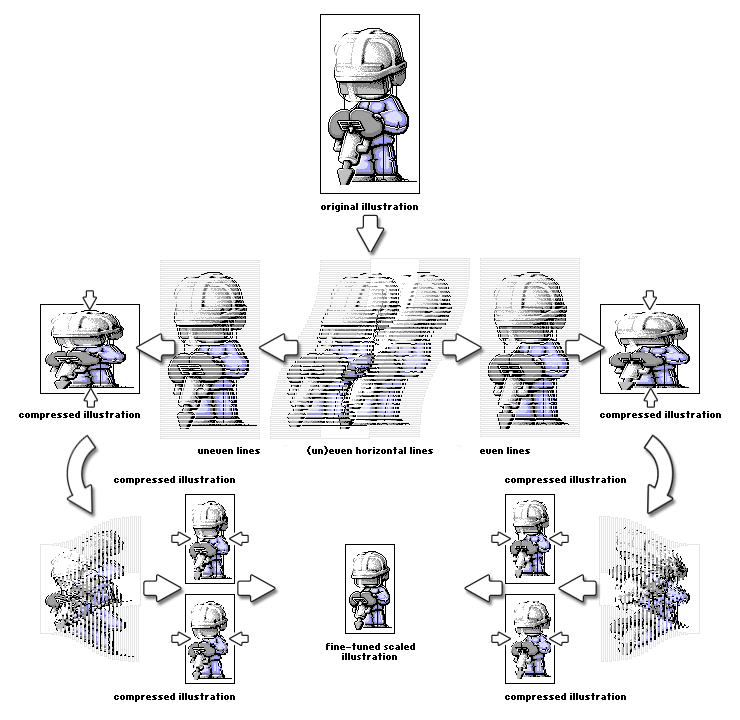
First carefully remove every even (or uneven) horizontal line. The
result has to be compressed vertically, to get rid of removed lines. The height of
the illustration is now reduced to the required size.
This process is repeated for the vertical lines. Remove either the even
or uneven vertical lines. To get rid of the lines you just removed,
compress the result again.
The result of this process is an illustration that is reduced in size by
50%.
The result is far from ideal, so you need to do some fine-tuning by
hand.
Depending on the scale, the interval of the lines that are removed can be increased or decreased.
Adobe Photoshop
If you have Adobe Photoshop installed, the above process
can be done much more easily.
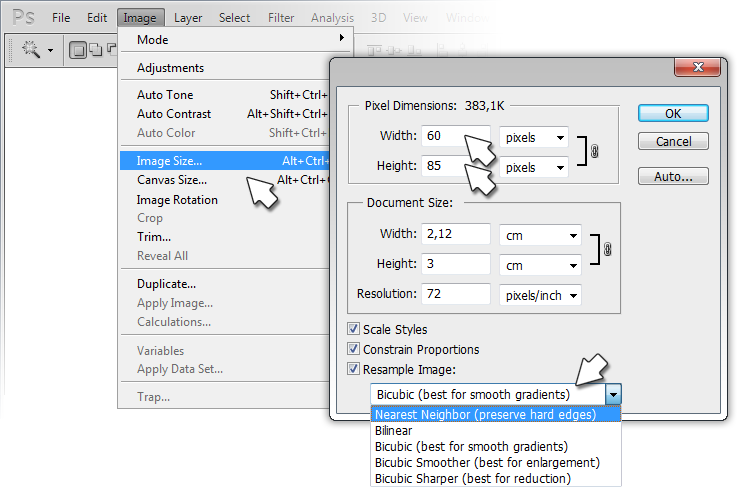
To scale your image, select 'Image > Image size'; the image size
window will appear. The width and height can be found in the image size
window. In case you are not yet using pixels as a measuring
unit, you'll have to select 'pixels' next to width or
height.
Be sure to select the option 'Nearest Neighbor (preserve hard edges)'.
The scaling of your pixel art image in Adobe Photoshop works fine as long as you scale your pixel art image by a factor two, three, and so on. If, for example, you would scale your pixel art image by 250%, the result will not be ideal; Adobe Photoshop is not able to resize each pixel by the same amount, so there will be a loss of quality (see left image).
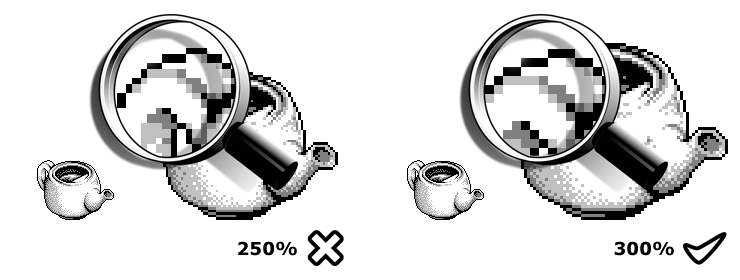
If you really have to scale your pixel art image by a factor other than 200%, 300%, etc., you will have to adjust your pixel art image by hand.
Scaling Indexed Color Images Versus True Color Images
As long as the illustration is an indexed color image and scaling is
done, the colors will not change.
However, if true color (RGB) illustrations are scaled, the amount of
colors will change.
The original road worker illustration is made with seven colors. By
scaling the illustration as a true color image, the amount of unique
colors will increase. This is the result of the technique Adobe
Photoshop (and other image manipulation programs) uses to calculate the
new smaller image.
If you take a close look at the image on the left, you will see a
smaller, less crisp version of the original.
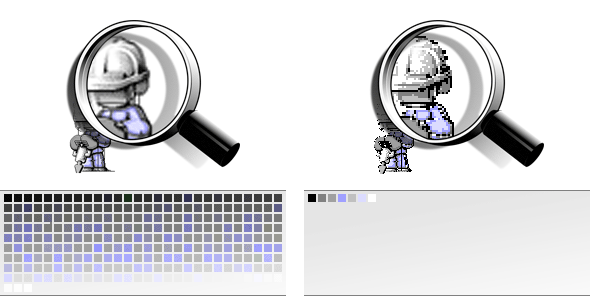
If the scaled down illustration is saved as a GIF - an indexed color
image - the amount of colors exceeds the maximum available 256 colors,
and dithering is used to fit all colors into these 256 most frequently
used colors.
Instead of GIF, PNG is in this case a better option as the file format.
Ms Paint
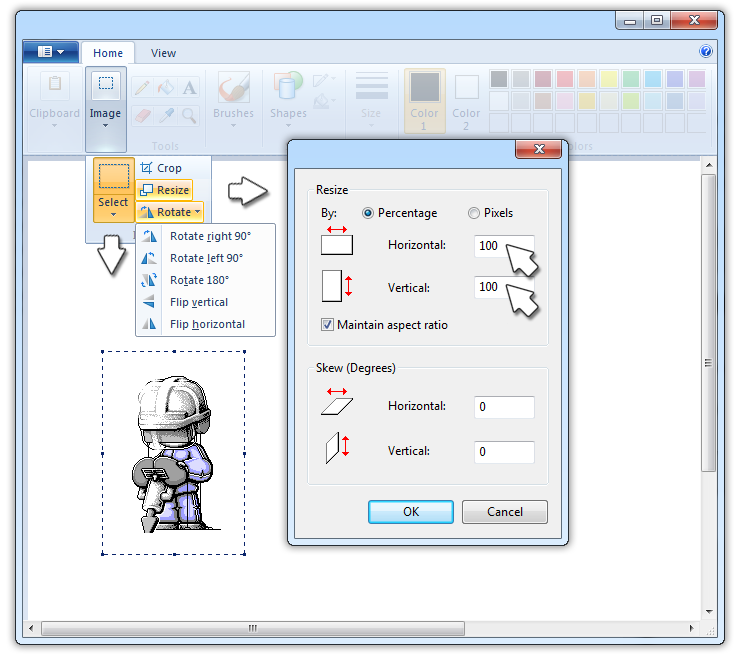
MS Paint offers an easy option to scale your pixel art illustration.
First select the illustration with the selection tool. Then choose
'Image' in the menu and select 'Stretch/Skew'. The Stretch and Skew
window appears.
Choose the required scale horizontally and vertically, press OK, and
the selection is scaled to the preferred percentages.
Scaling by hand is done without the Stretch and Skew window.
Select the part of the illustration you want to scale, move the mouse to
the dot on the right lower side of the selection (the four-sides cursor
changes into a two-sides cursor). Click and drag until your are
satisfied with the result.
